SV-WAM: An Efficient Surround-View World-Action Model for End-to-End Autonomous Driving

Research project page

Learning from future visual dynamics during training, planning efficiently with six-camera surround-view observations at inference.

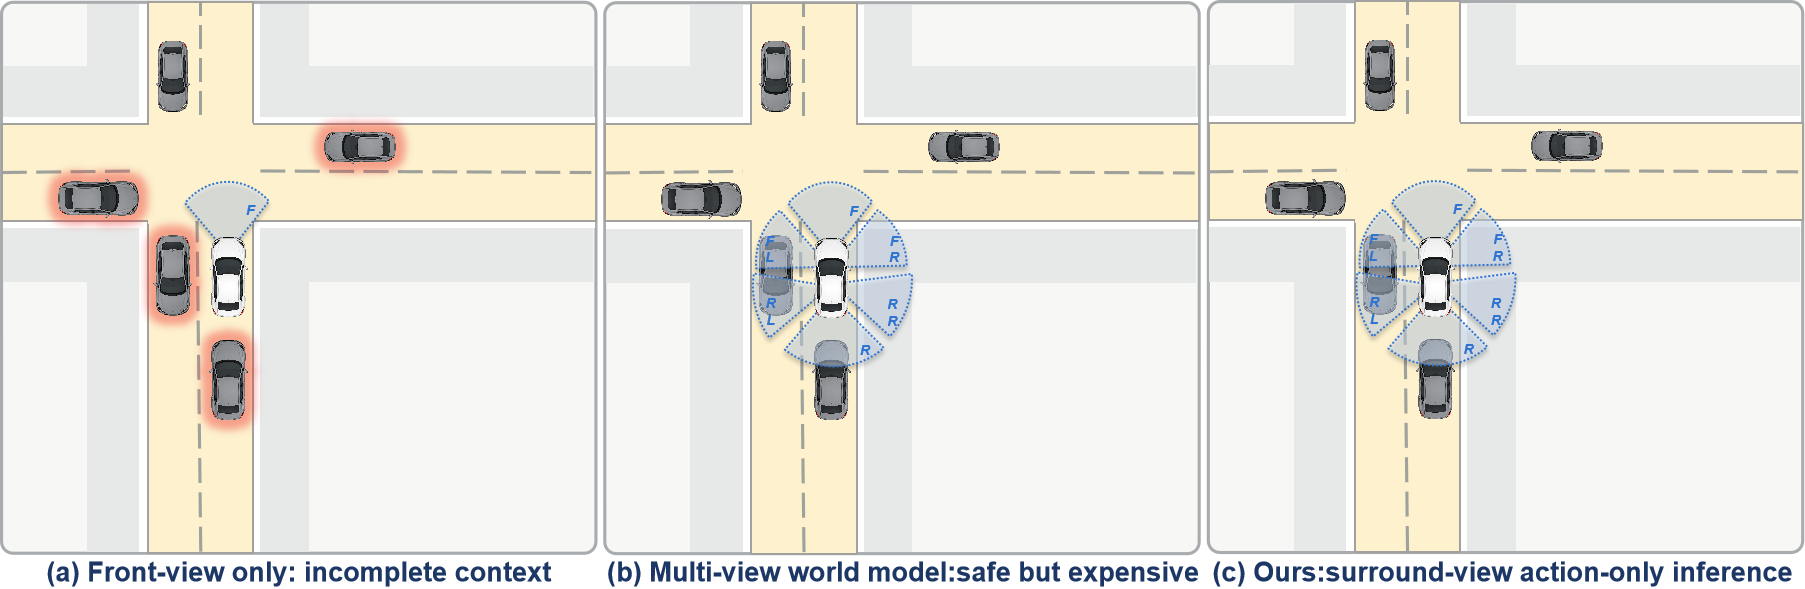
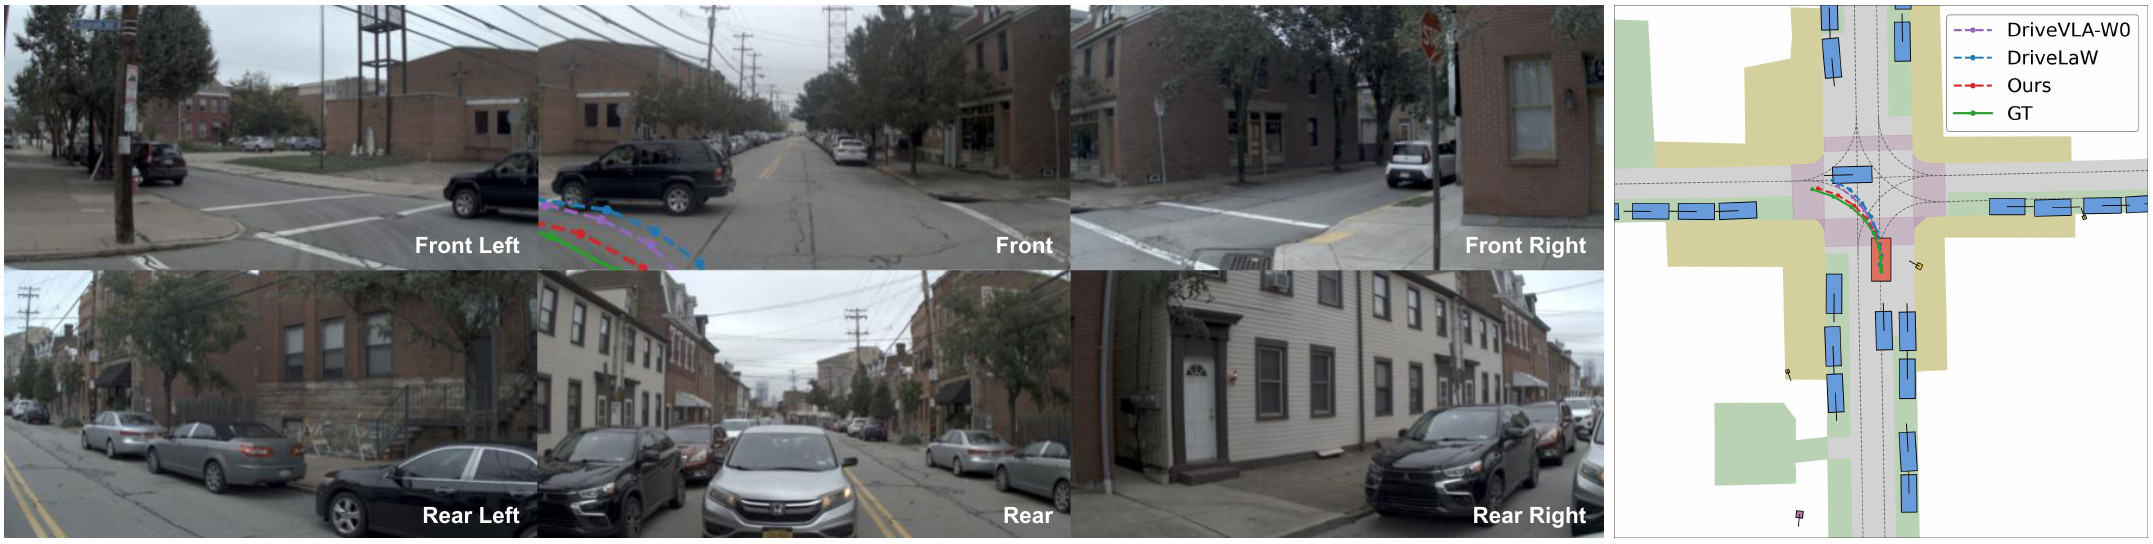
Teaser. A front-only view misses the rear-left approaching vehicle; the full surround view reveals the crucial context.Open original MP4 ↗

Abstract

World models offer a promising direction for end-to-end autonomous driving, but generating future videos at inference time can be computationally expensive. Using only a front-facing camera also limits access to side and rear traffic, which can be critical for turns, merges, and lane changes. SV-WAM learns from historical six-view camera observations, action tokens, and future-video latent supervision during training, while retaining efficient action-only inference at deployment. An action-centered causal attention mask prevents future-video information from leaking into action prediction, and a differentiable drivable-area compliance regularizer guides road-aware trajectories. The project evaluates the approach with driving benchmarks and qualitative comparisons, including cases illustrating the value of full surround-view perception.

Method Overview

Learning from future video does not require generating future video when the planner is deployed.

Six-view perception

Use front, lateral, and rear visual context rather than relying solely on the front-facing camera.

Joint world-action learning

Train with action and future-video flow matching under action-centered causal attention.

Action-only inference

Remove the future-video branch at deployment and regularize the training trajectory with drivable-area compliance.

Qualitative Video Demonstrations

All nine demonstration videos from the SV-WAM repository are included below. Every clip is displayed in its own full-width player without side-by-side compression or cropping. Use fullscreen for finer trajectory inspection.

Comparison with DriveLaW and DriveVLA-W0

Four synchronized multi-camera and bird's-eye-view planning comparisons. Purple: DriveVLA-W0; blue: DriveLaW; red: SV-WAM; green: ground truth.

Baseline Comparison 01DriveVLA-W0 (purple) · DriveLaW (blue) · SV-WAM (red) · GT (green)Open original MP4 ↗
Baseline Comparison 02DriveVLA-W0 (purple) · DriveLaW (blue) · SV-WAM (red) · GT (green)Open original MP4 ↗
Baseline Comparison 03DriveVLA-W0 (purple) · DriveLaW (blue) · SV-WAM (red) · GT (green)Open original MP4 ↗
Baseline Comparison 04DriveVLA-W0 (purple) · DriveLaW (blue) · SV-WAM (red) · GT (green)Open original MP4 ↗

SV-WAM Planning Examples

Four further full-width videos showing the SV-WAM trajectory (red) and ground truth (green).

SV-WAM Planning 01SV-WAM (red) · Ground Truth (green)Open original MP4 ↗
SV-WAM Planning 02SV-WAM (red) · Ground Truth (green)Open original MP4 ↗
SV-WAM Planning 03SV-WAM (red) · Ground Truth (green)Open original MP4 ↗
SV-WAM Planning 04SV-WAM (red) · Ground Truth (green)Open original MP4 ↗

Experimental Results & Visual Analysis

Figures are displayed one per row at the full available content width. Click any image to inspect the original high-resolution file.
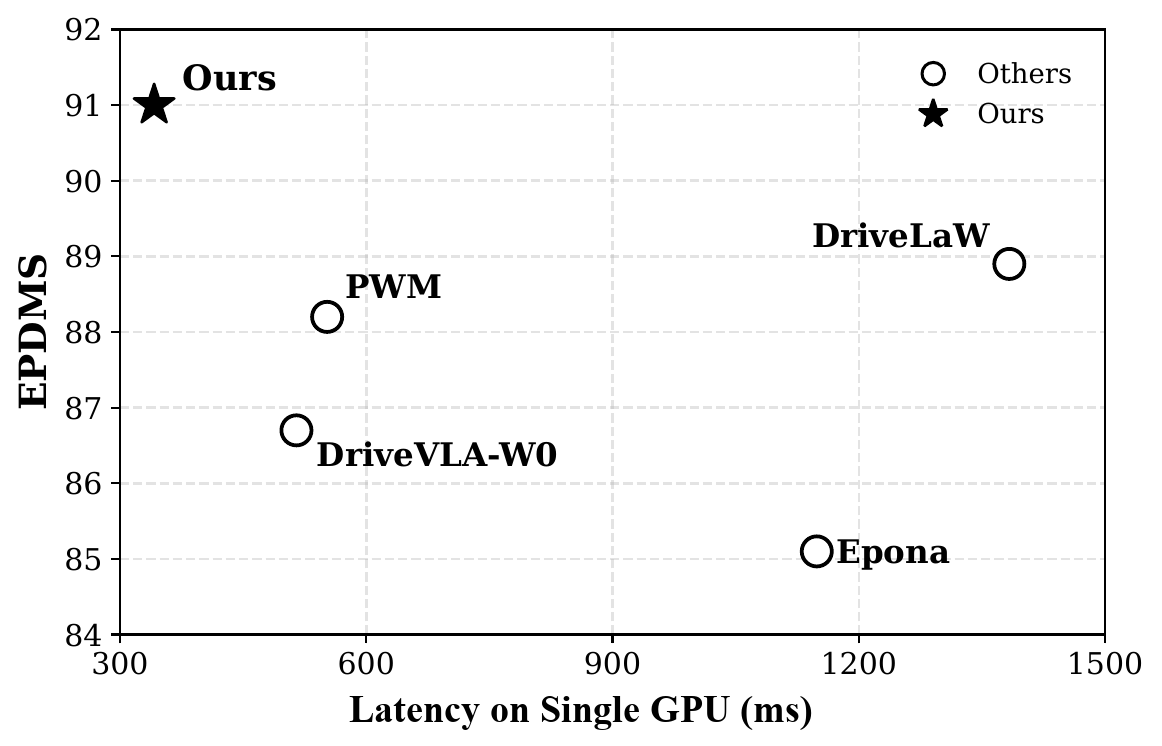
Planning performance and inference latency
Planning performance and inference latency — EPDMS versus preprocessed-input-to-trajectory latency on NAVSIMv2. View full resolution ↗
Qualitative turning comparison
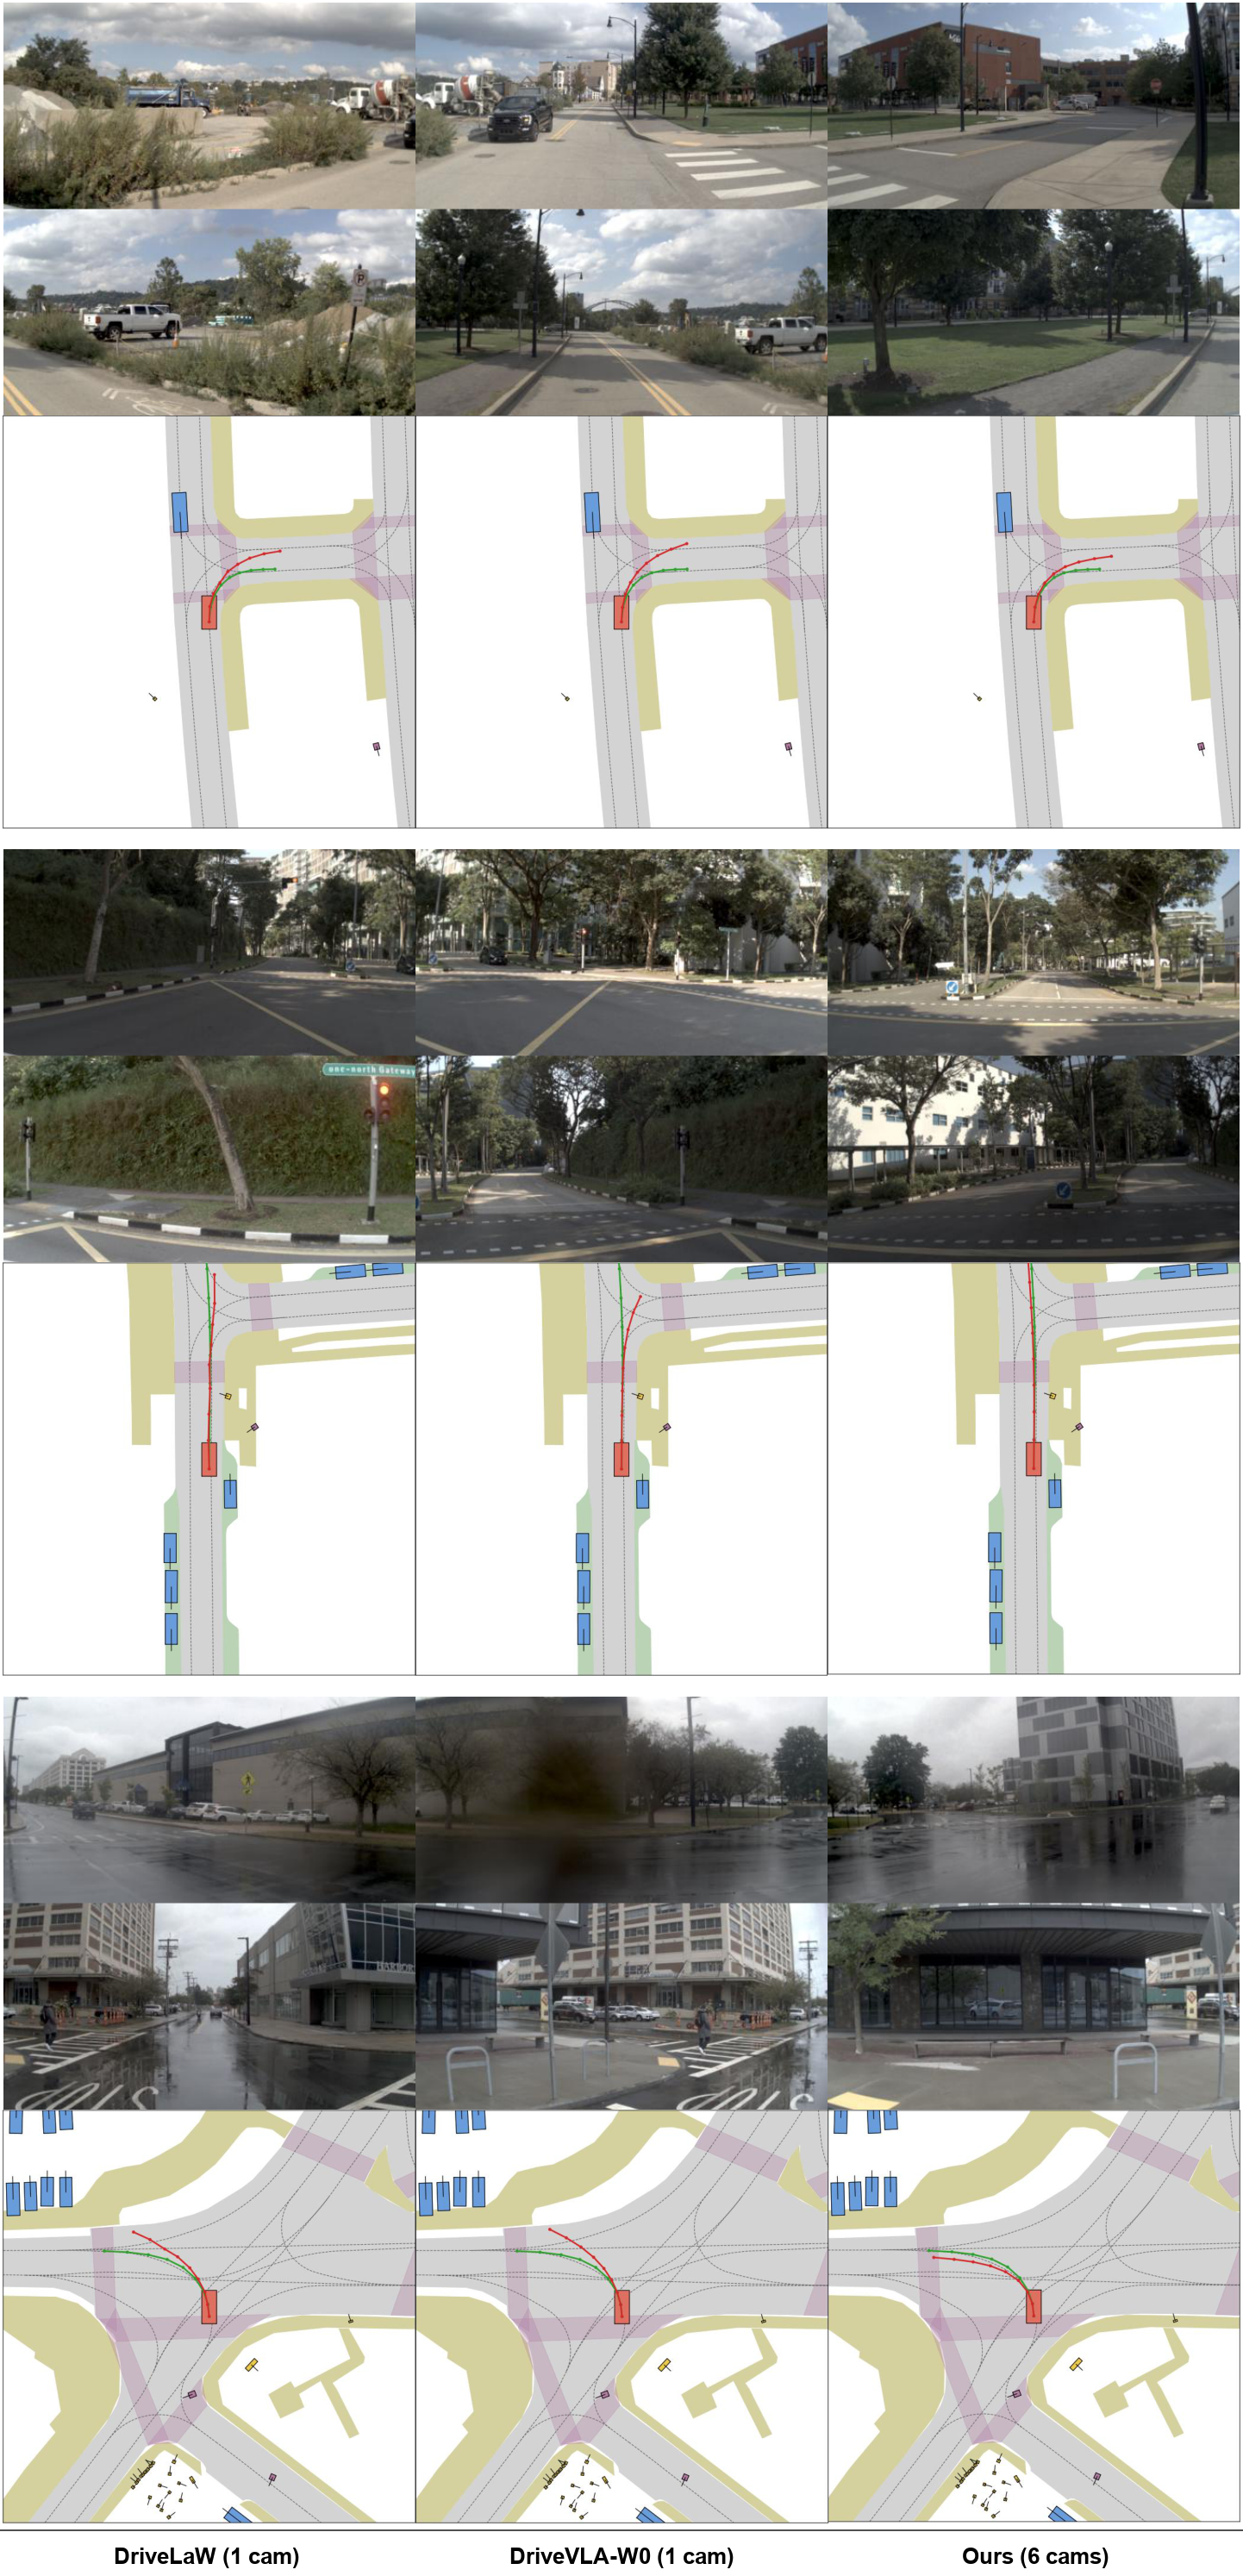
Qualitative turning comparison — SV-WAM and baseline trajectory predictions on a challenging turn. View full resolution ↗
Zero-shot transfer
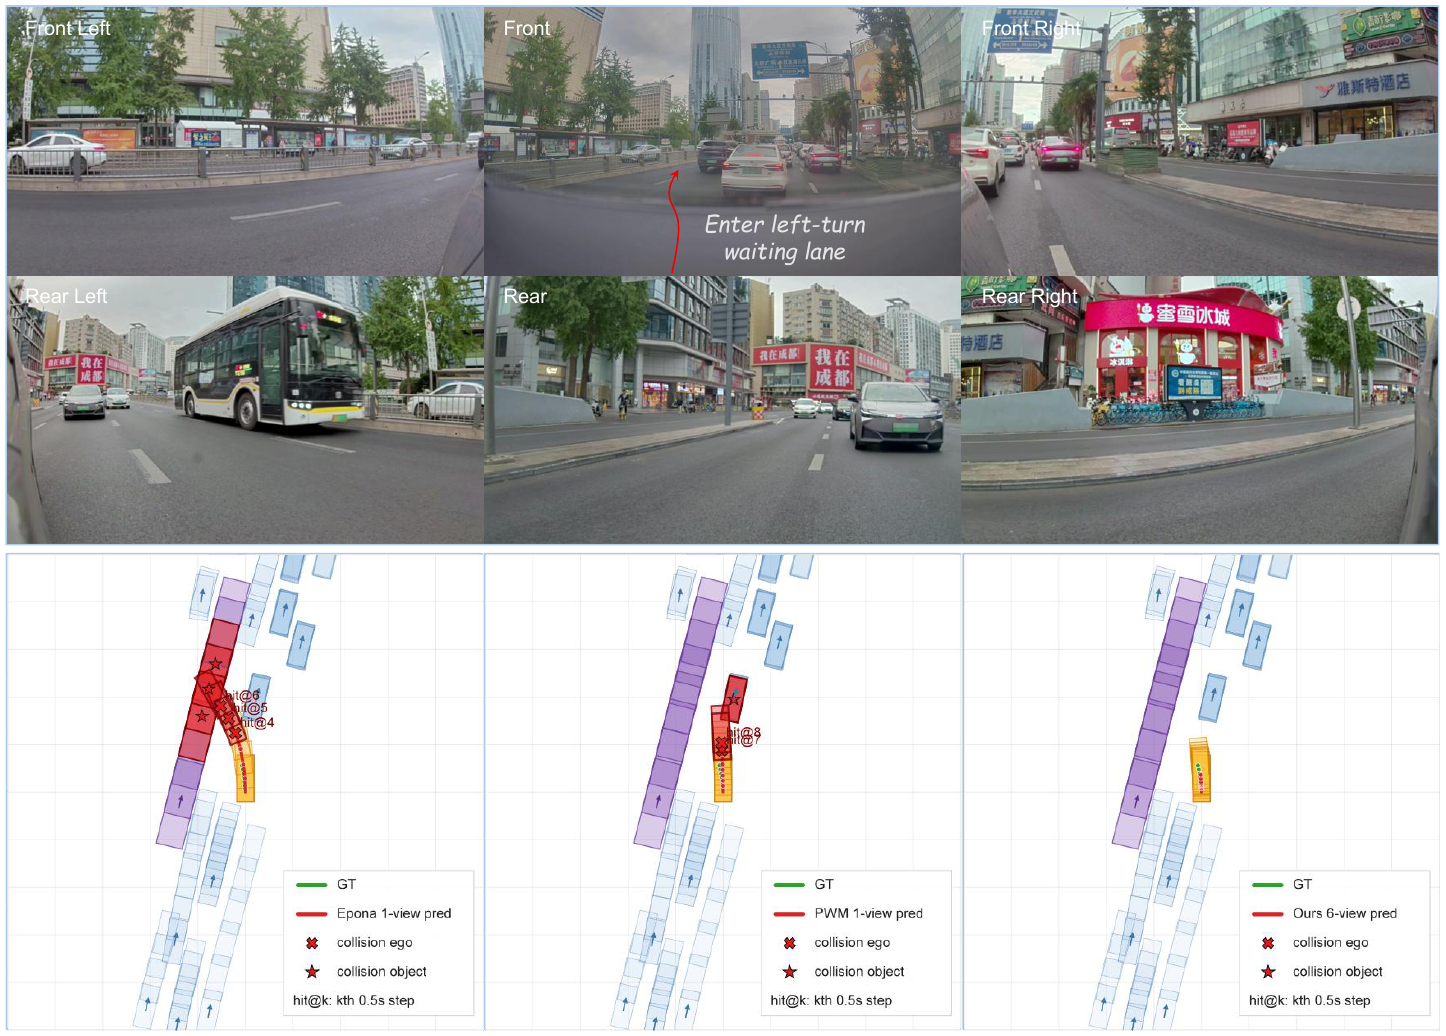
Zero-shot transfer — A left-turn waiting-lane case under domain transfer. View full resolution ↗
Camera coverage ablation
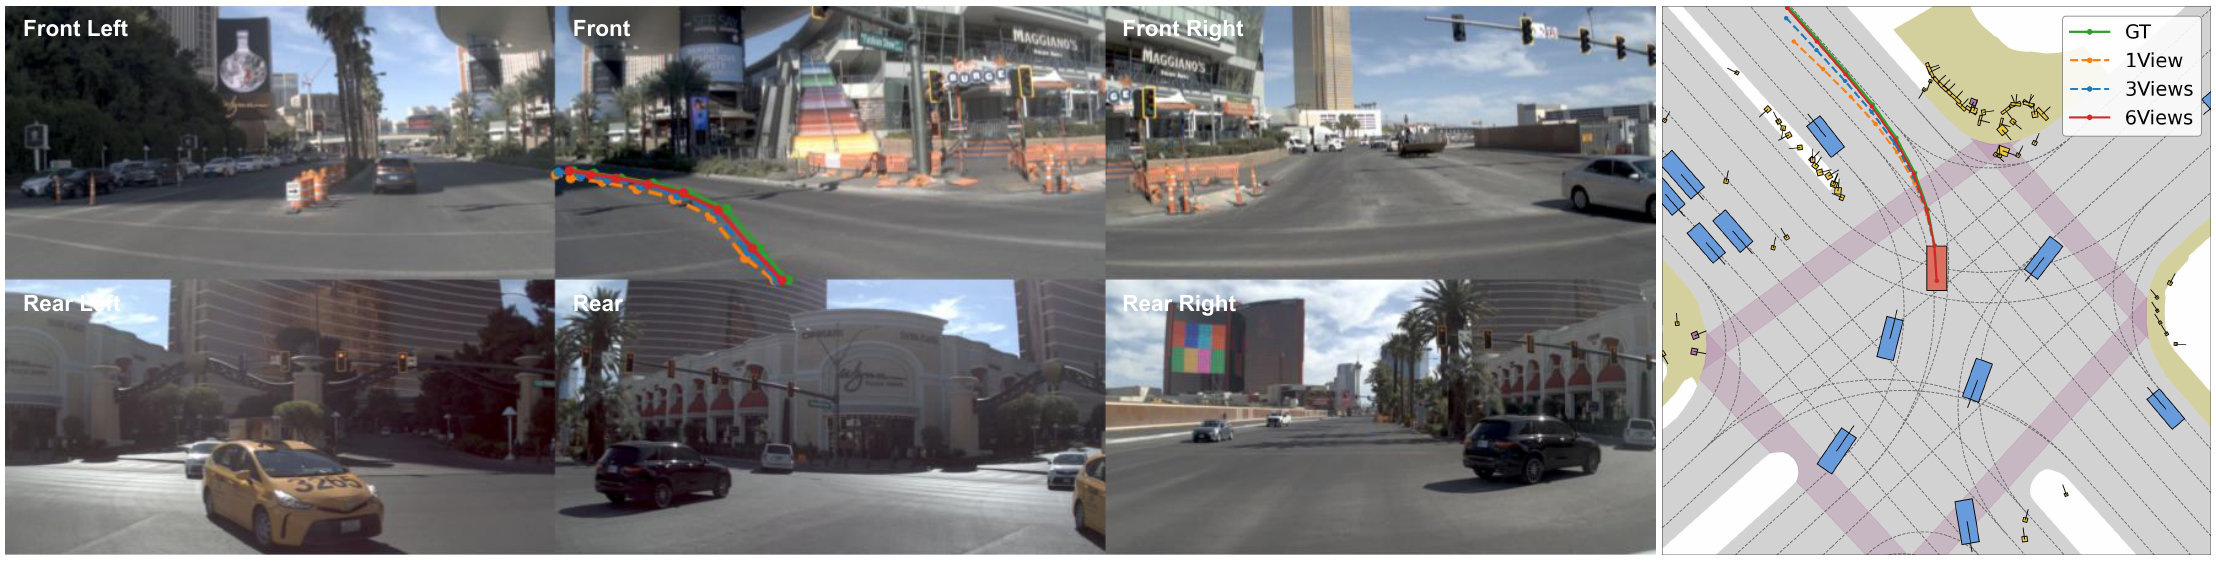
Camera coverage ablation — Comparison of 1-, 3-, and 6-view input settings. View full resolution ↗
Action-to-view attention
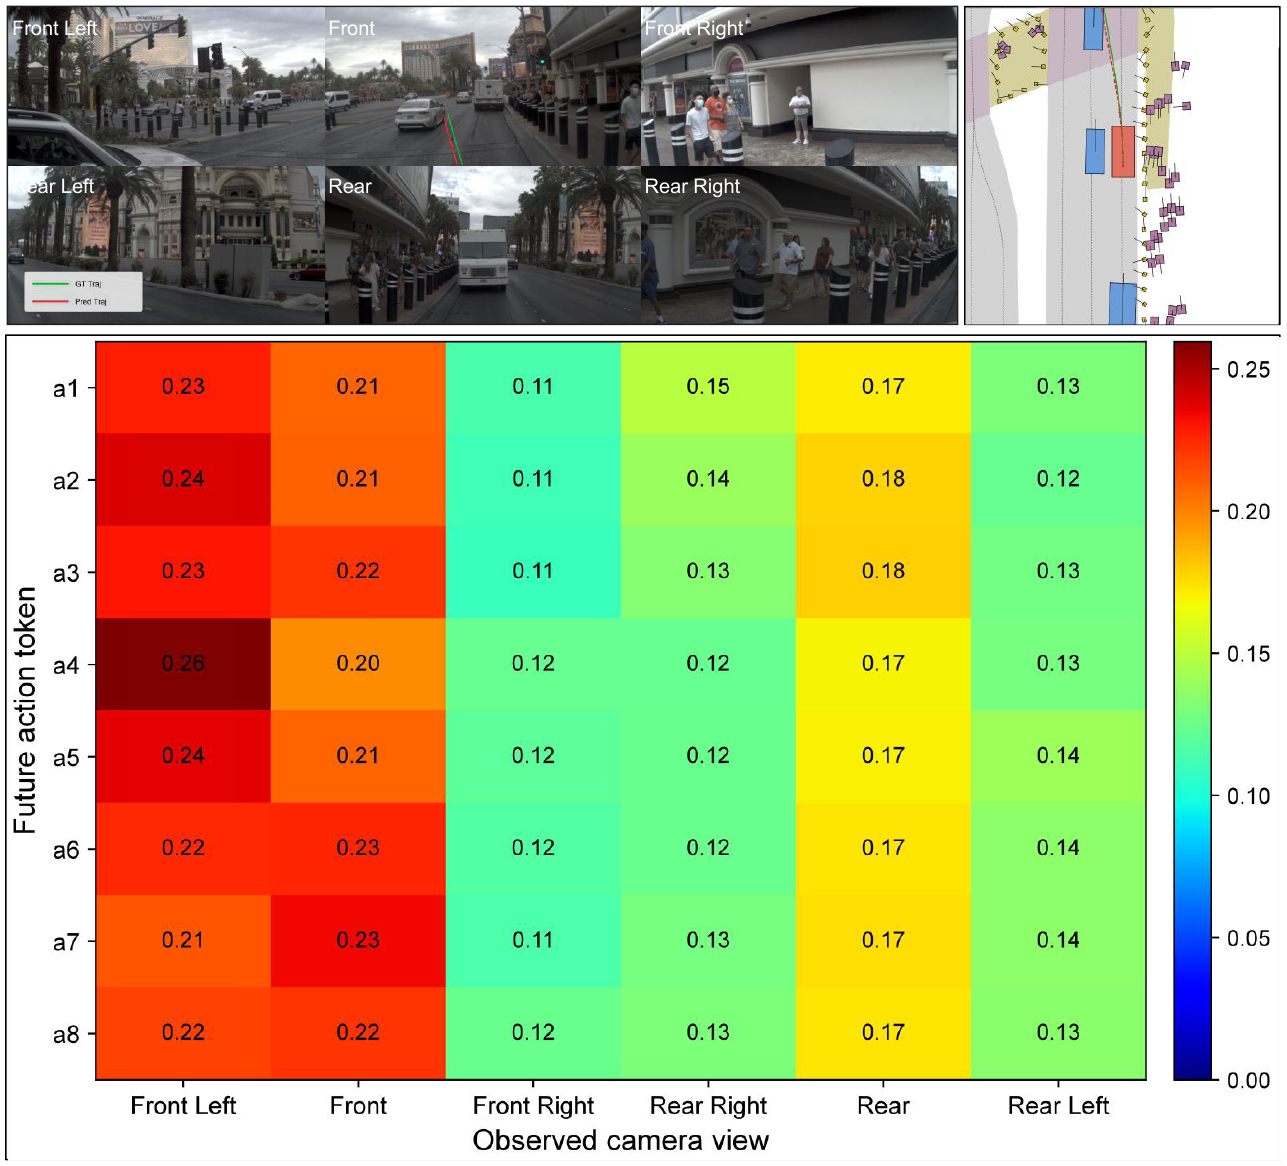
Action-to-view attention — Attention distribution across cameras in a left-lane-change case. View full resolution ↗

Additional Qualitative Visualizations

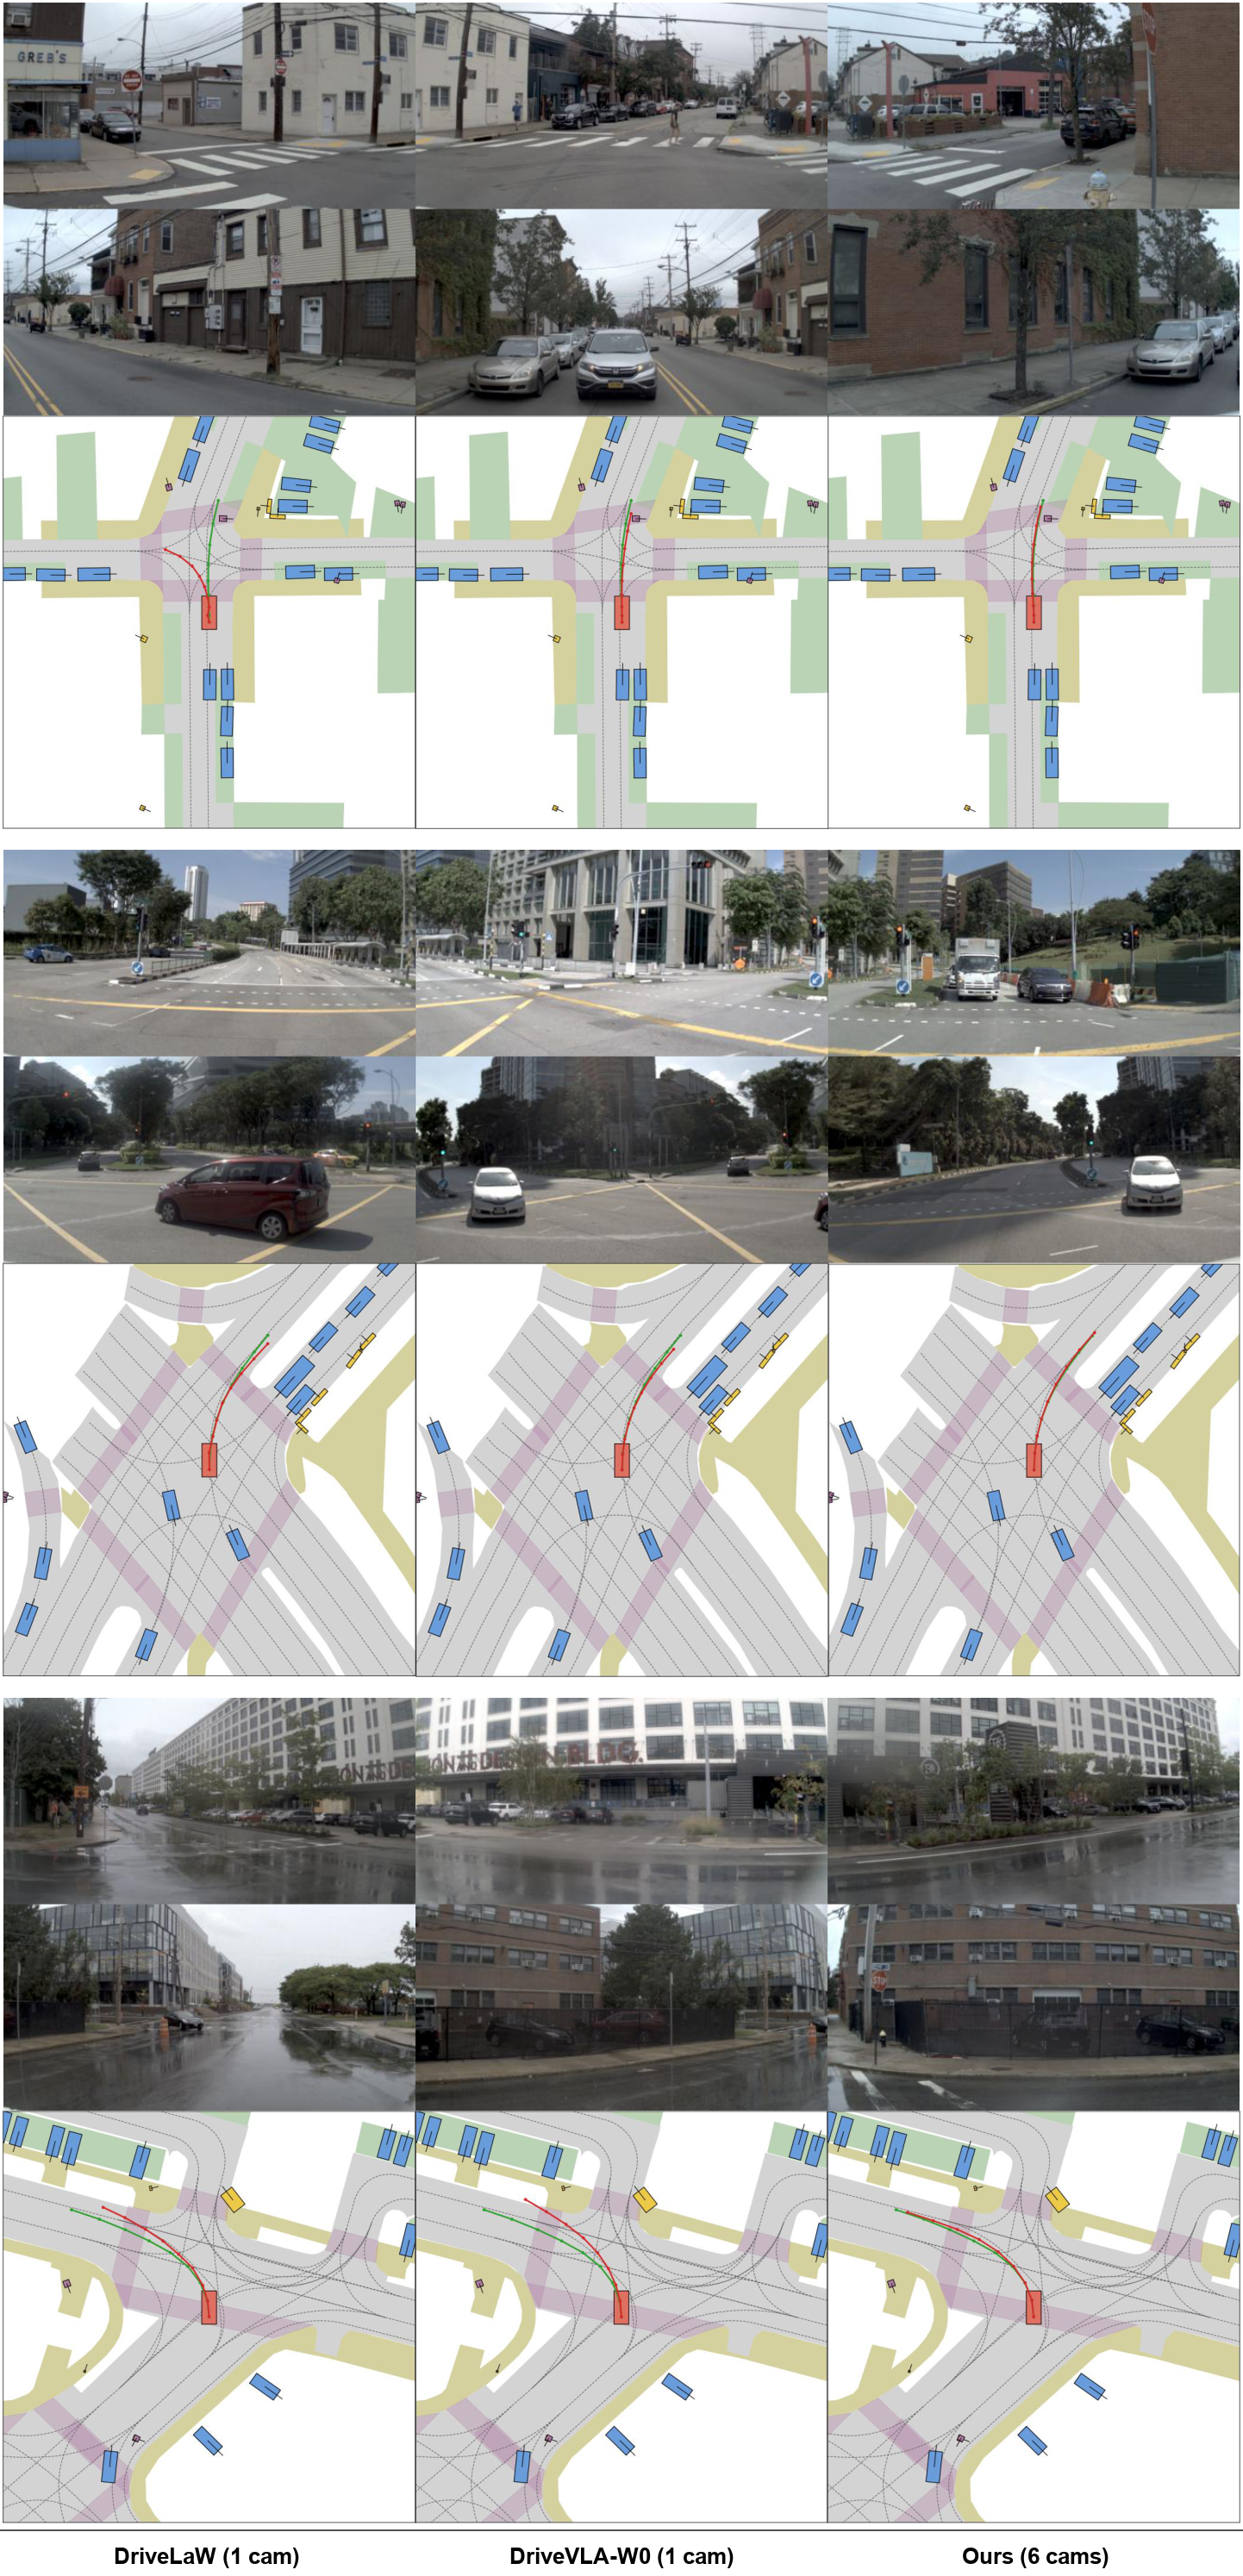
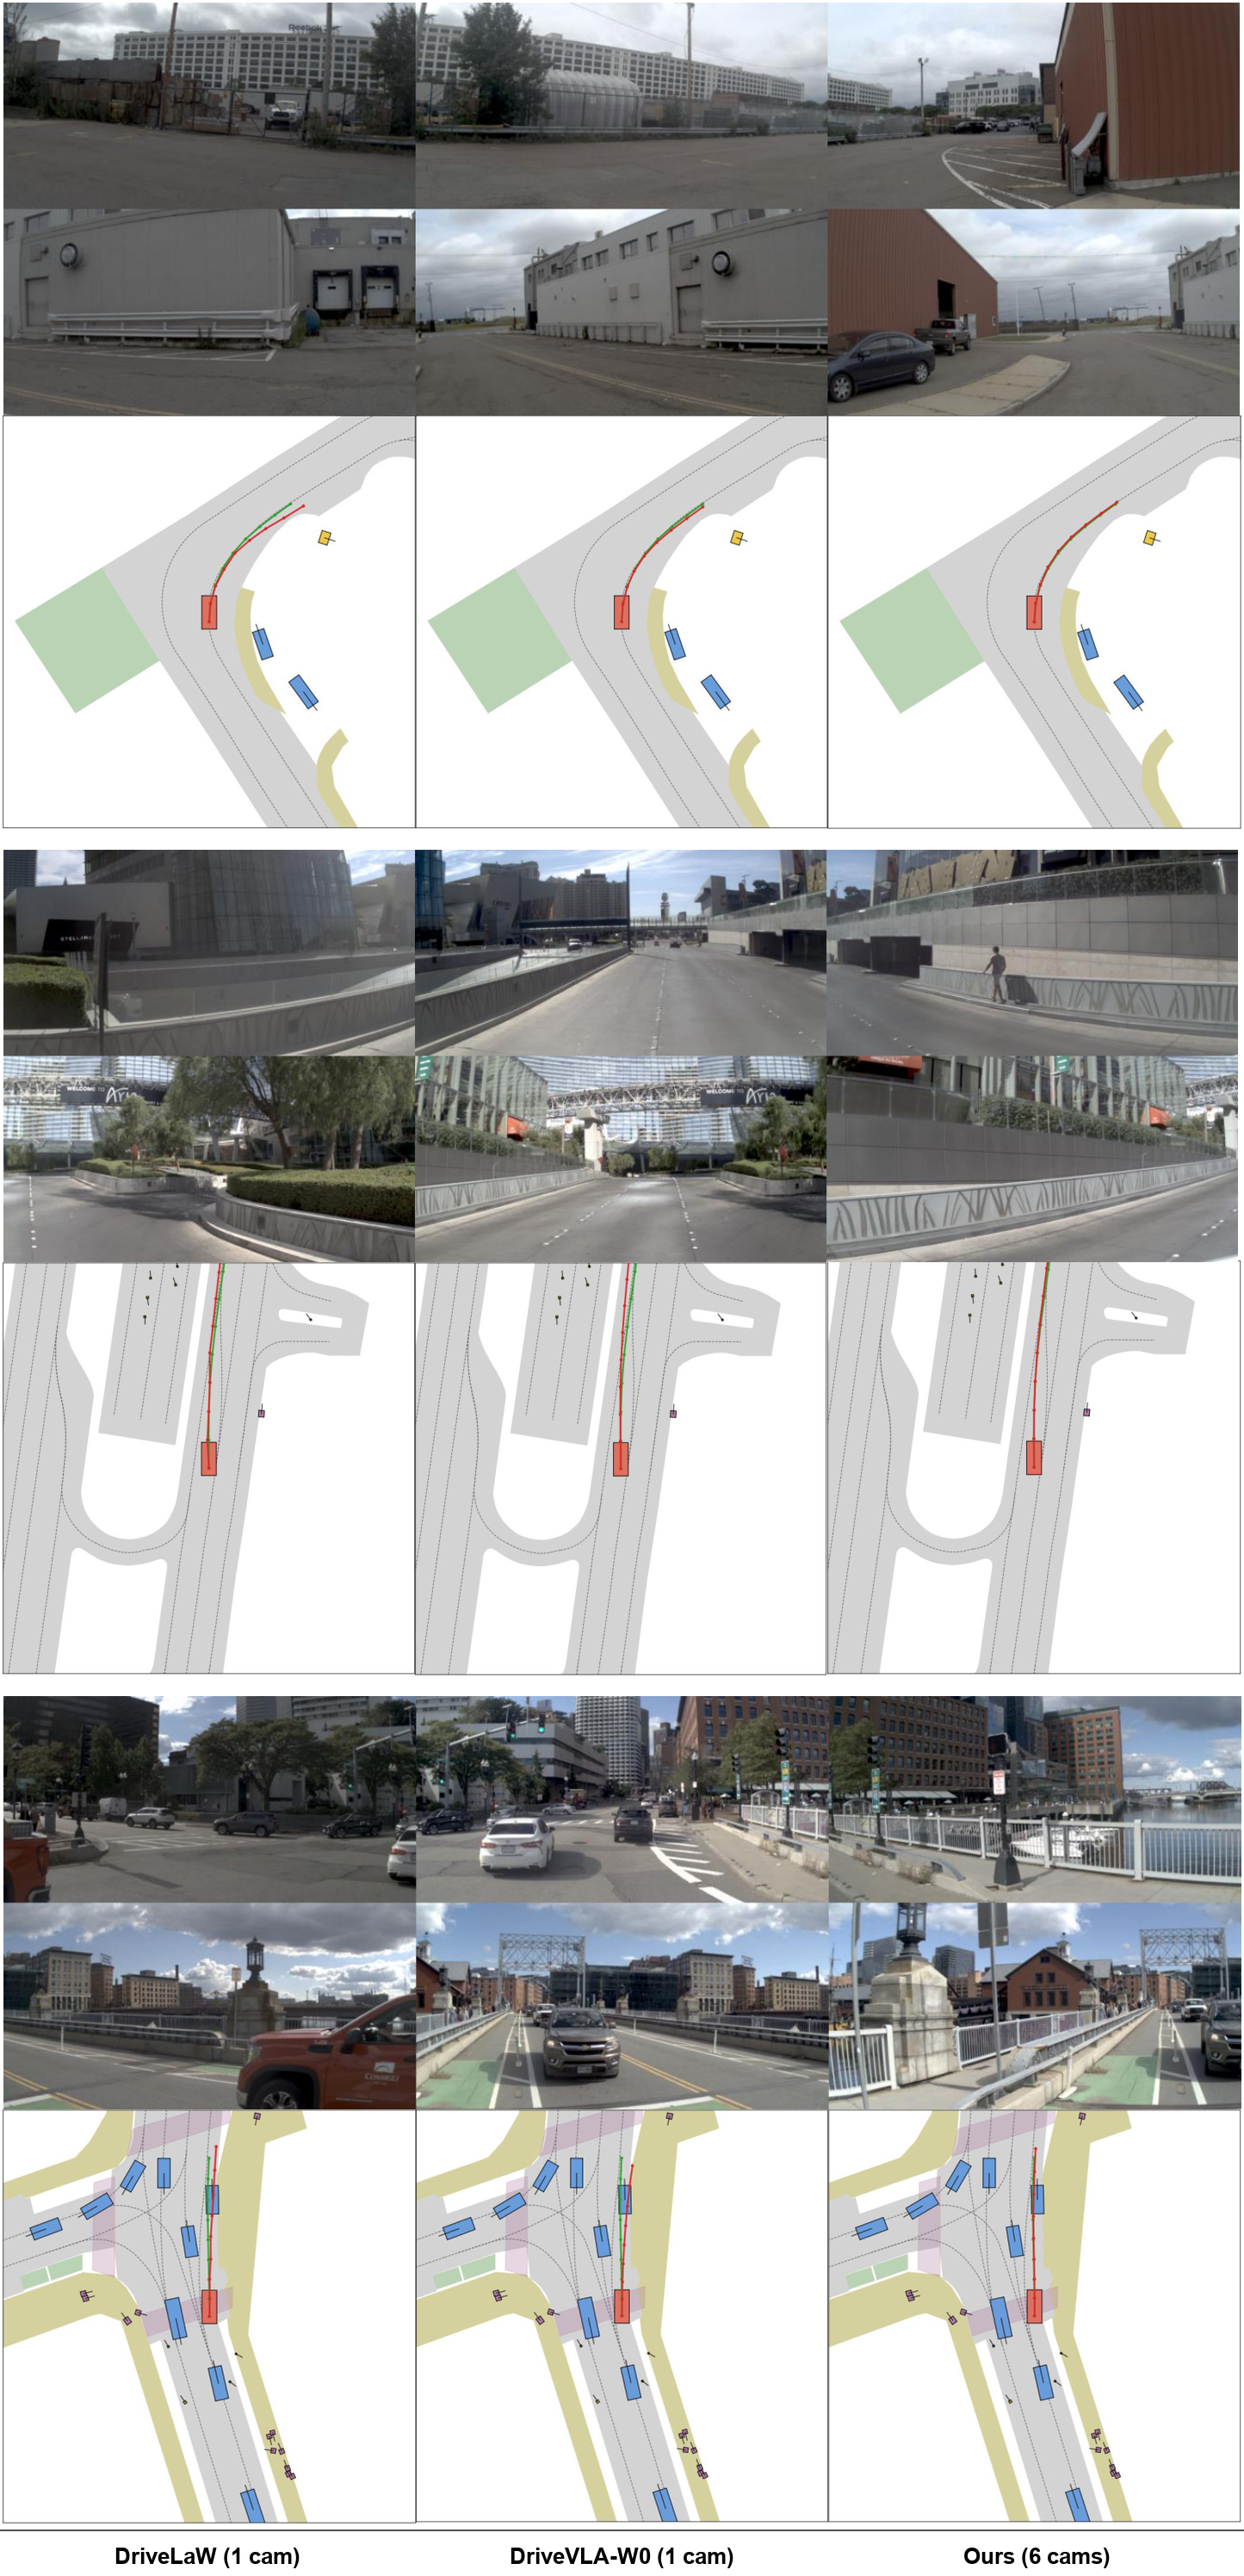
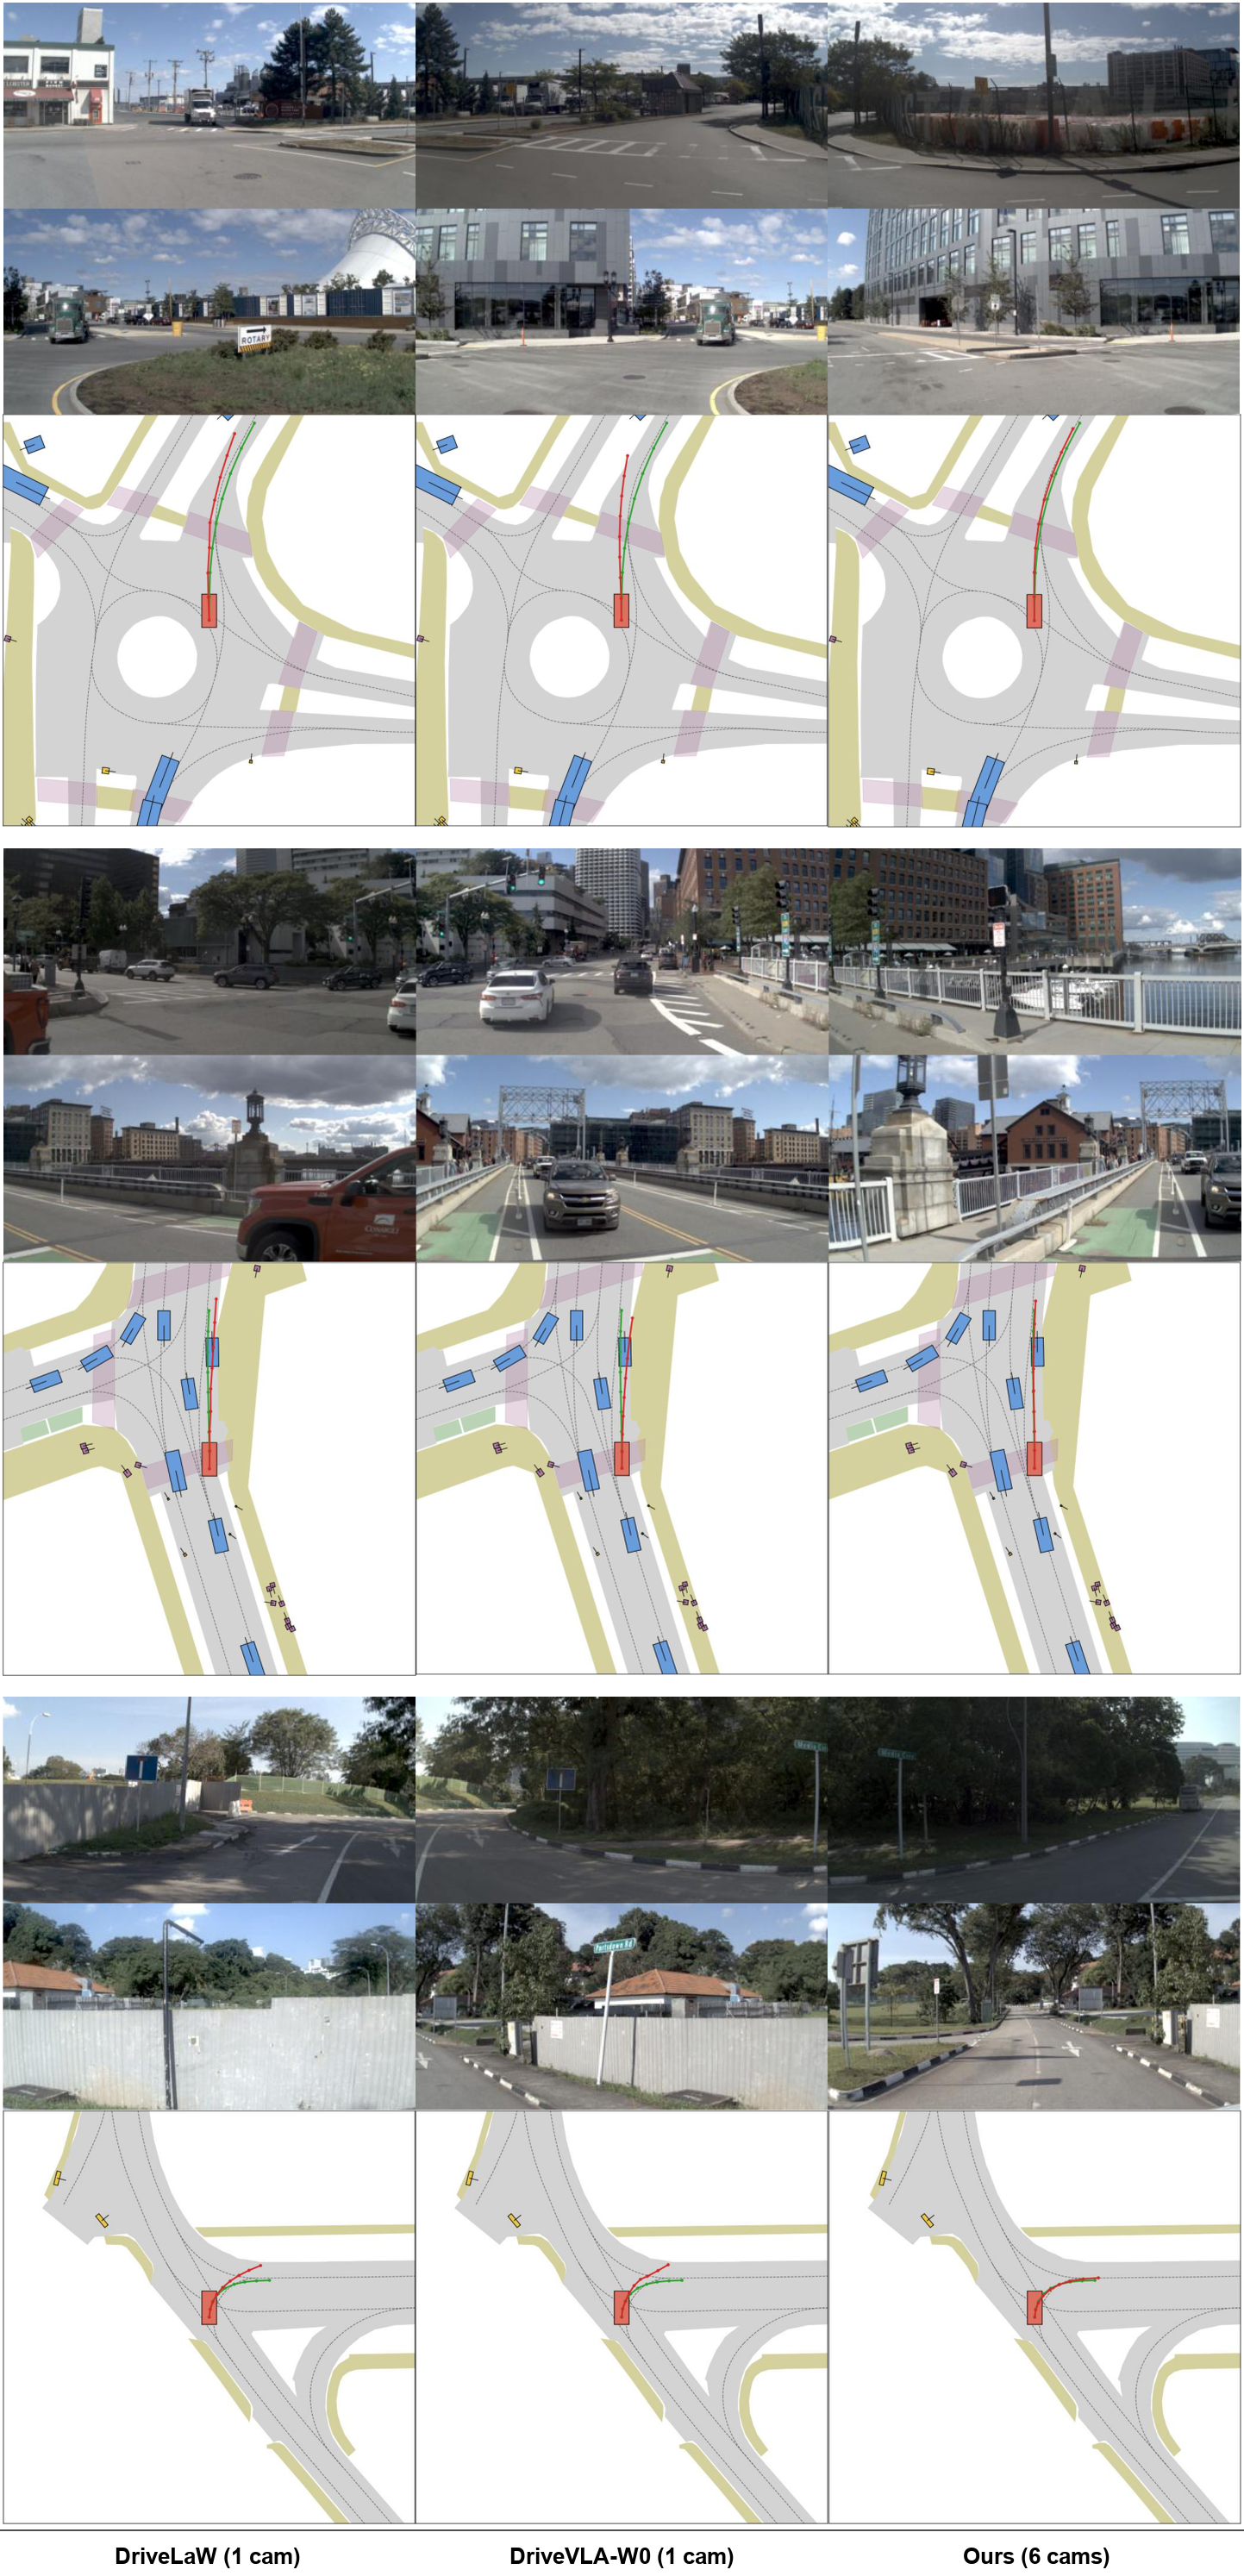
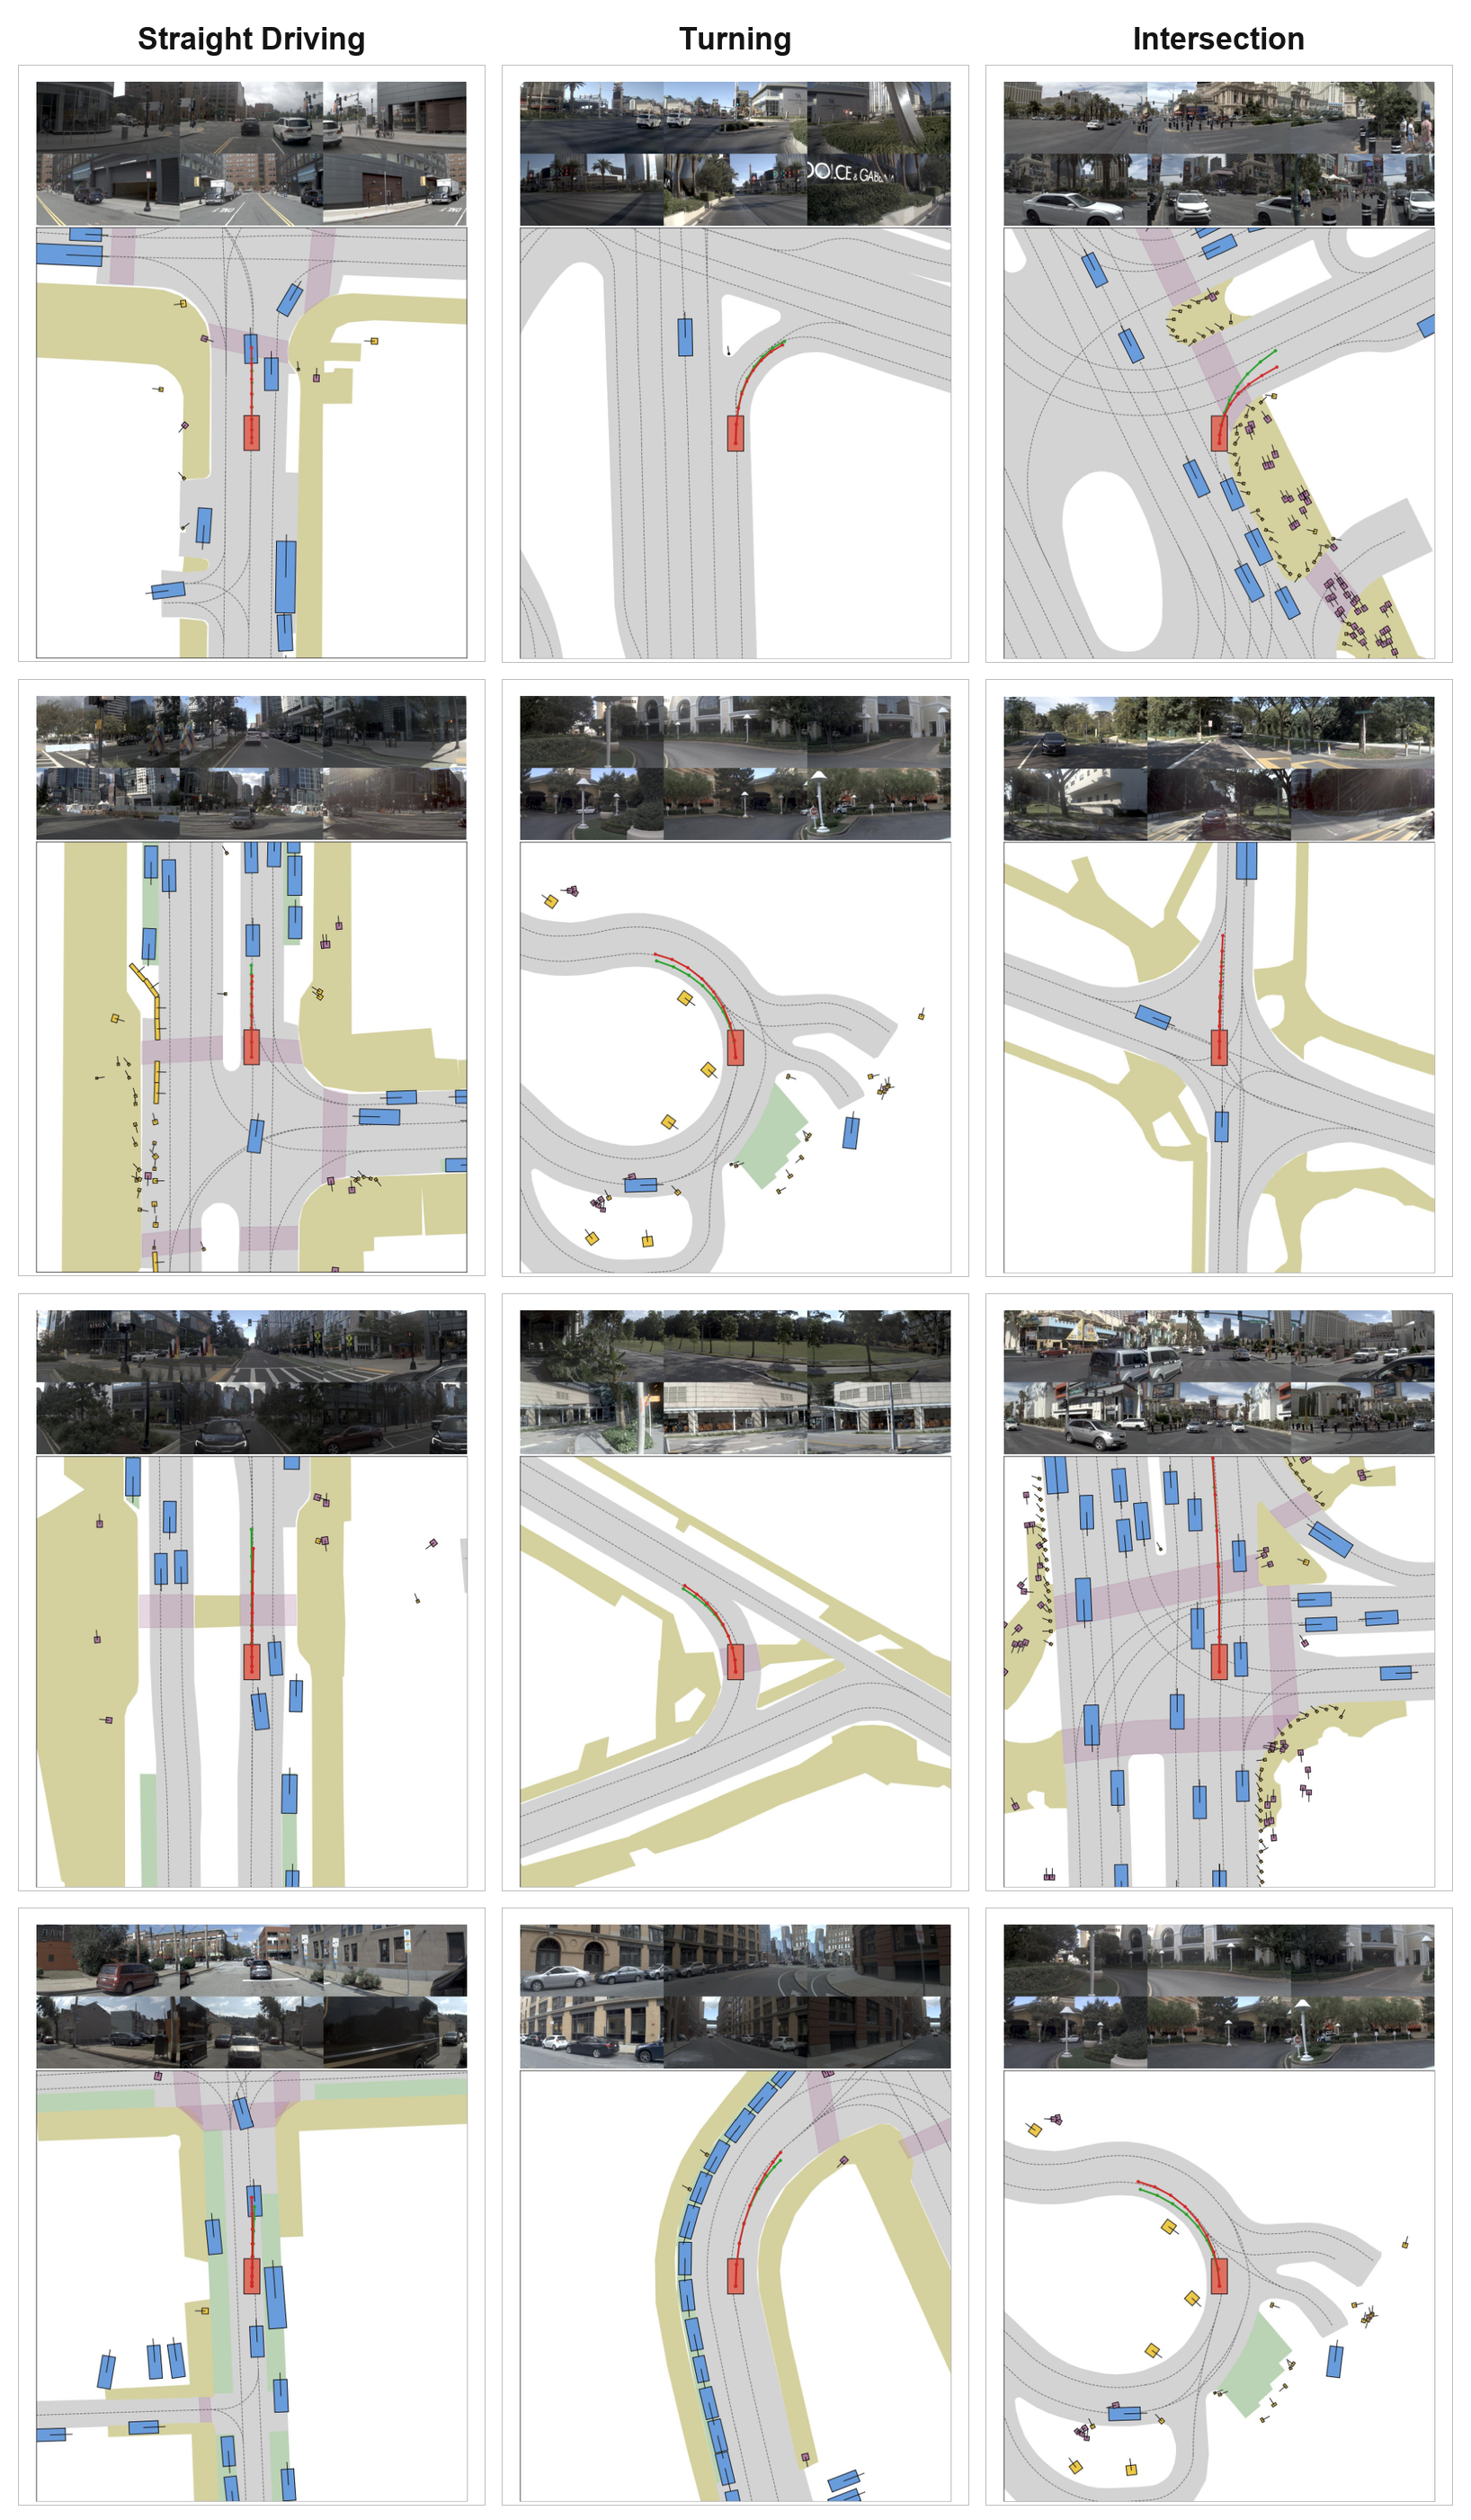
Supplementary materials in the repository include fifteen further comparison scenarios, success and failure cases, and an additional visualization. All are shown below at full width, rather than as tiny thumbnails.

15 Comparison Scenarios

Five high-resolution panels, covering cases 01–15 in groups of three.
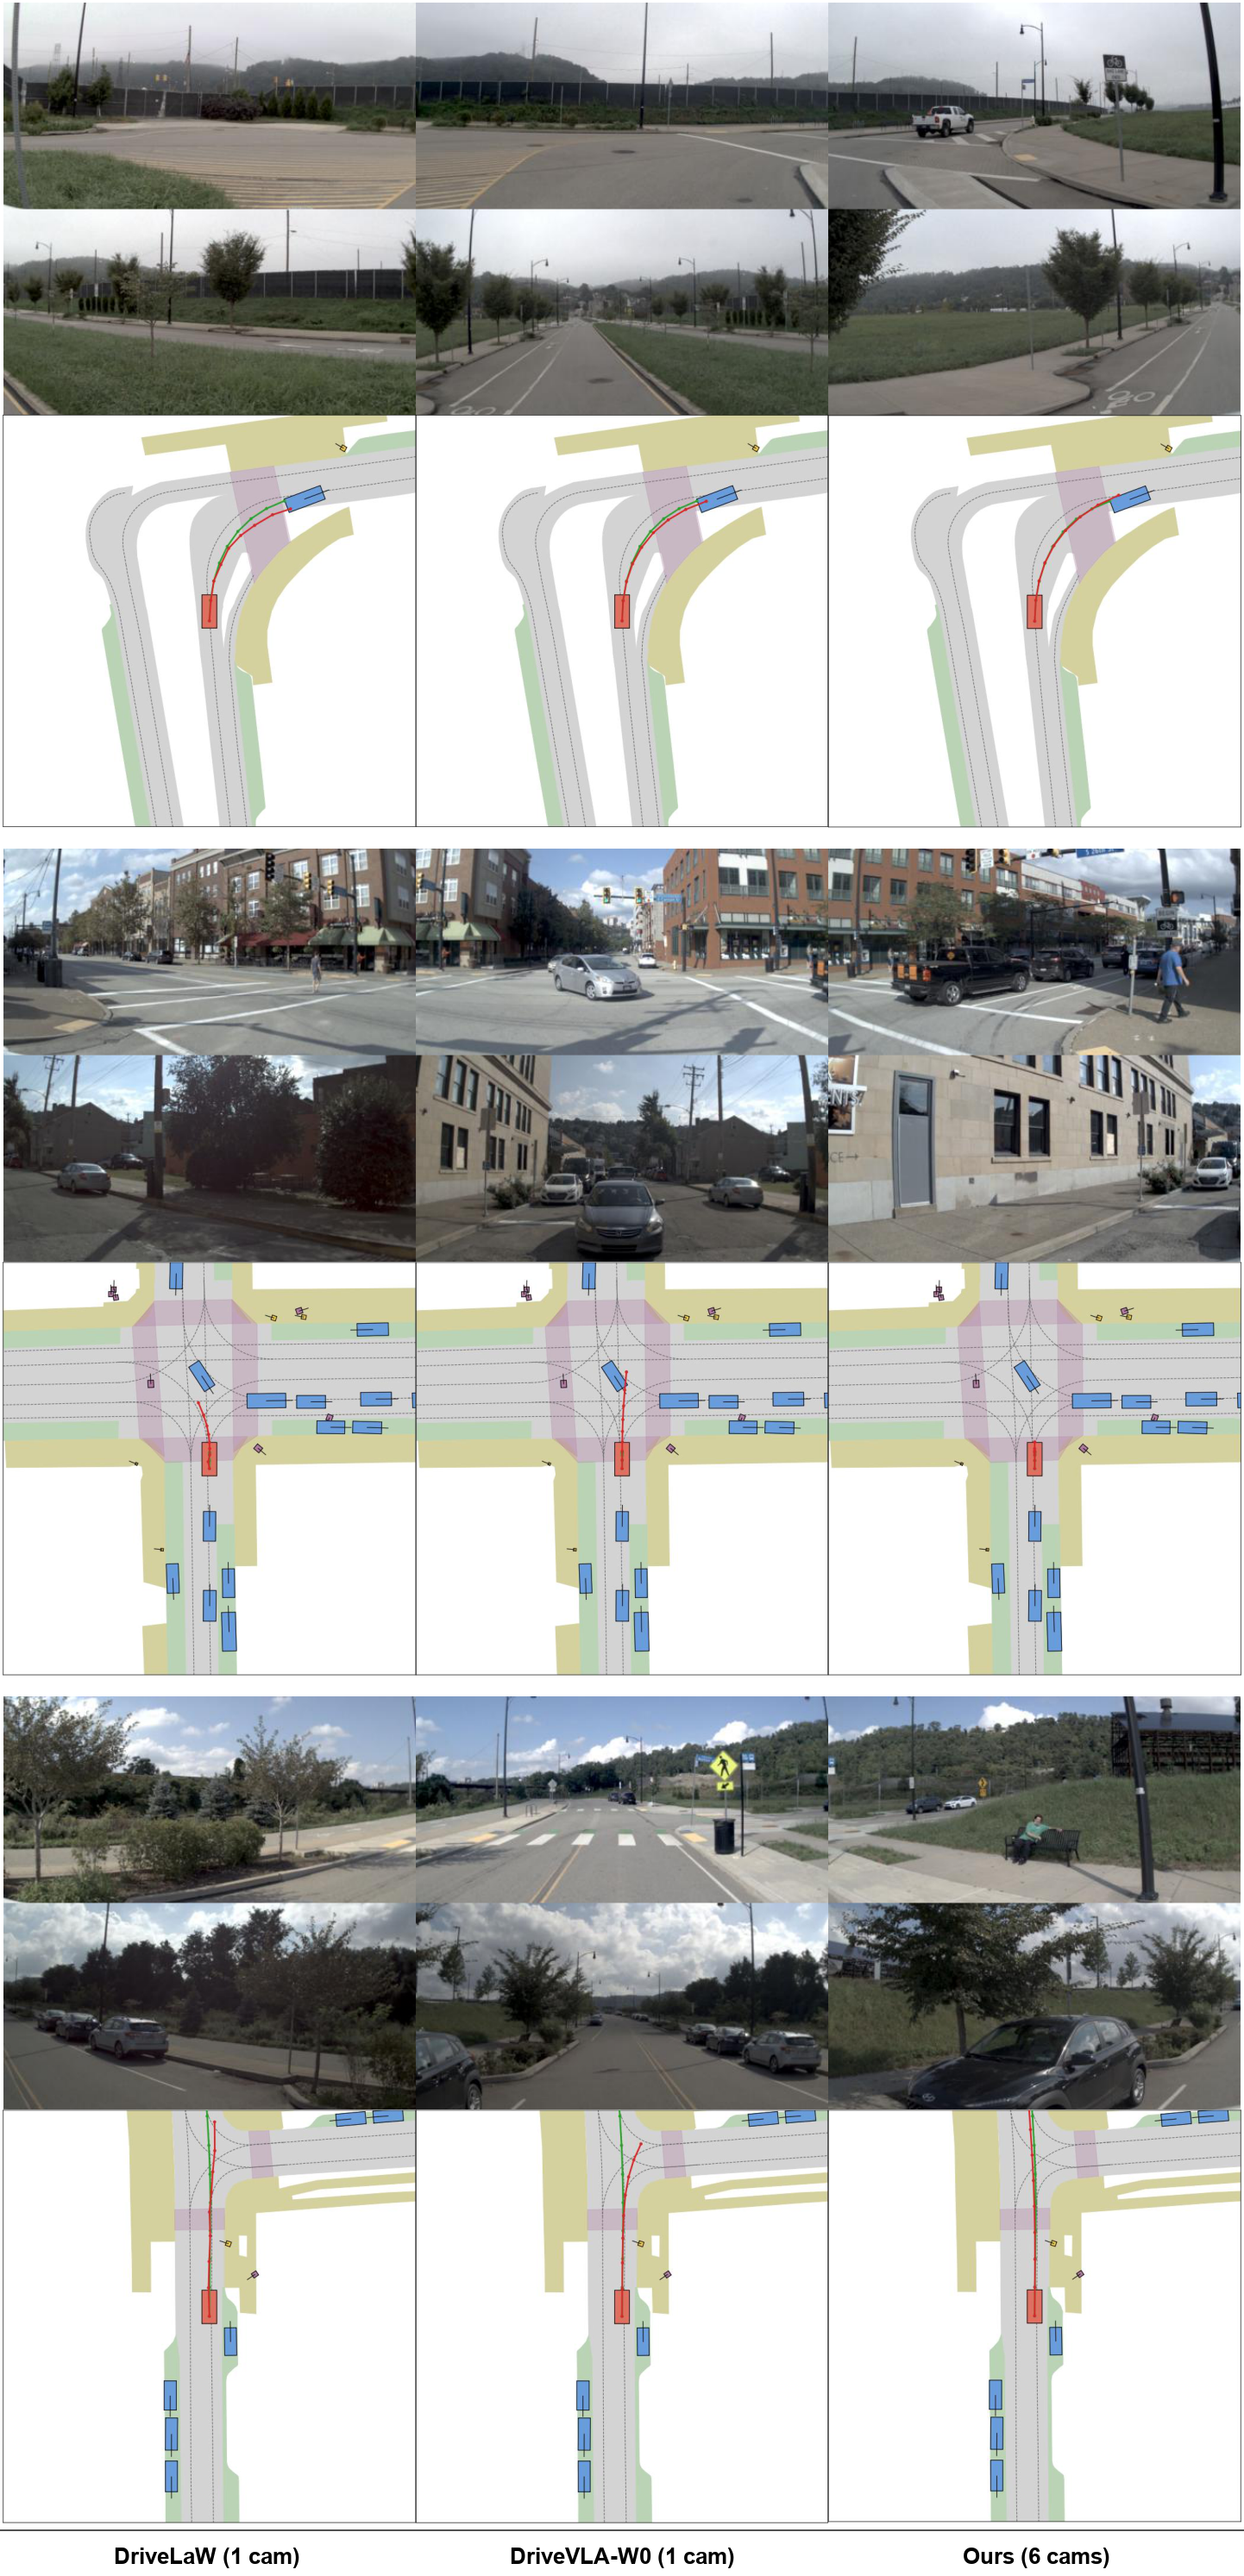
Comparison cases 01–03
Comparison cases 01–03 View full resolution ↗
Comparison cases 04–06
Comparison cases 04–06 View full resolution ↗
Comparison cases 07–09
Comparison cases 07–09 View full resolution ↗
Comparison cases 10–12
Comparison cases 10–12 View full resolution ↗
Comparison cases 13–15
Comparison cases 13–15 View full resolution ↗

Success Cases

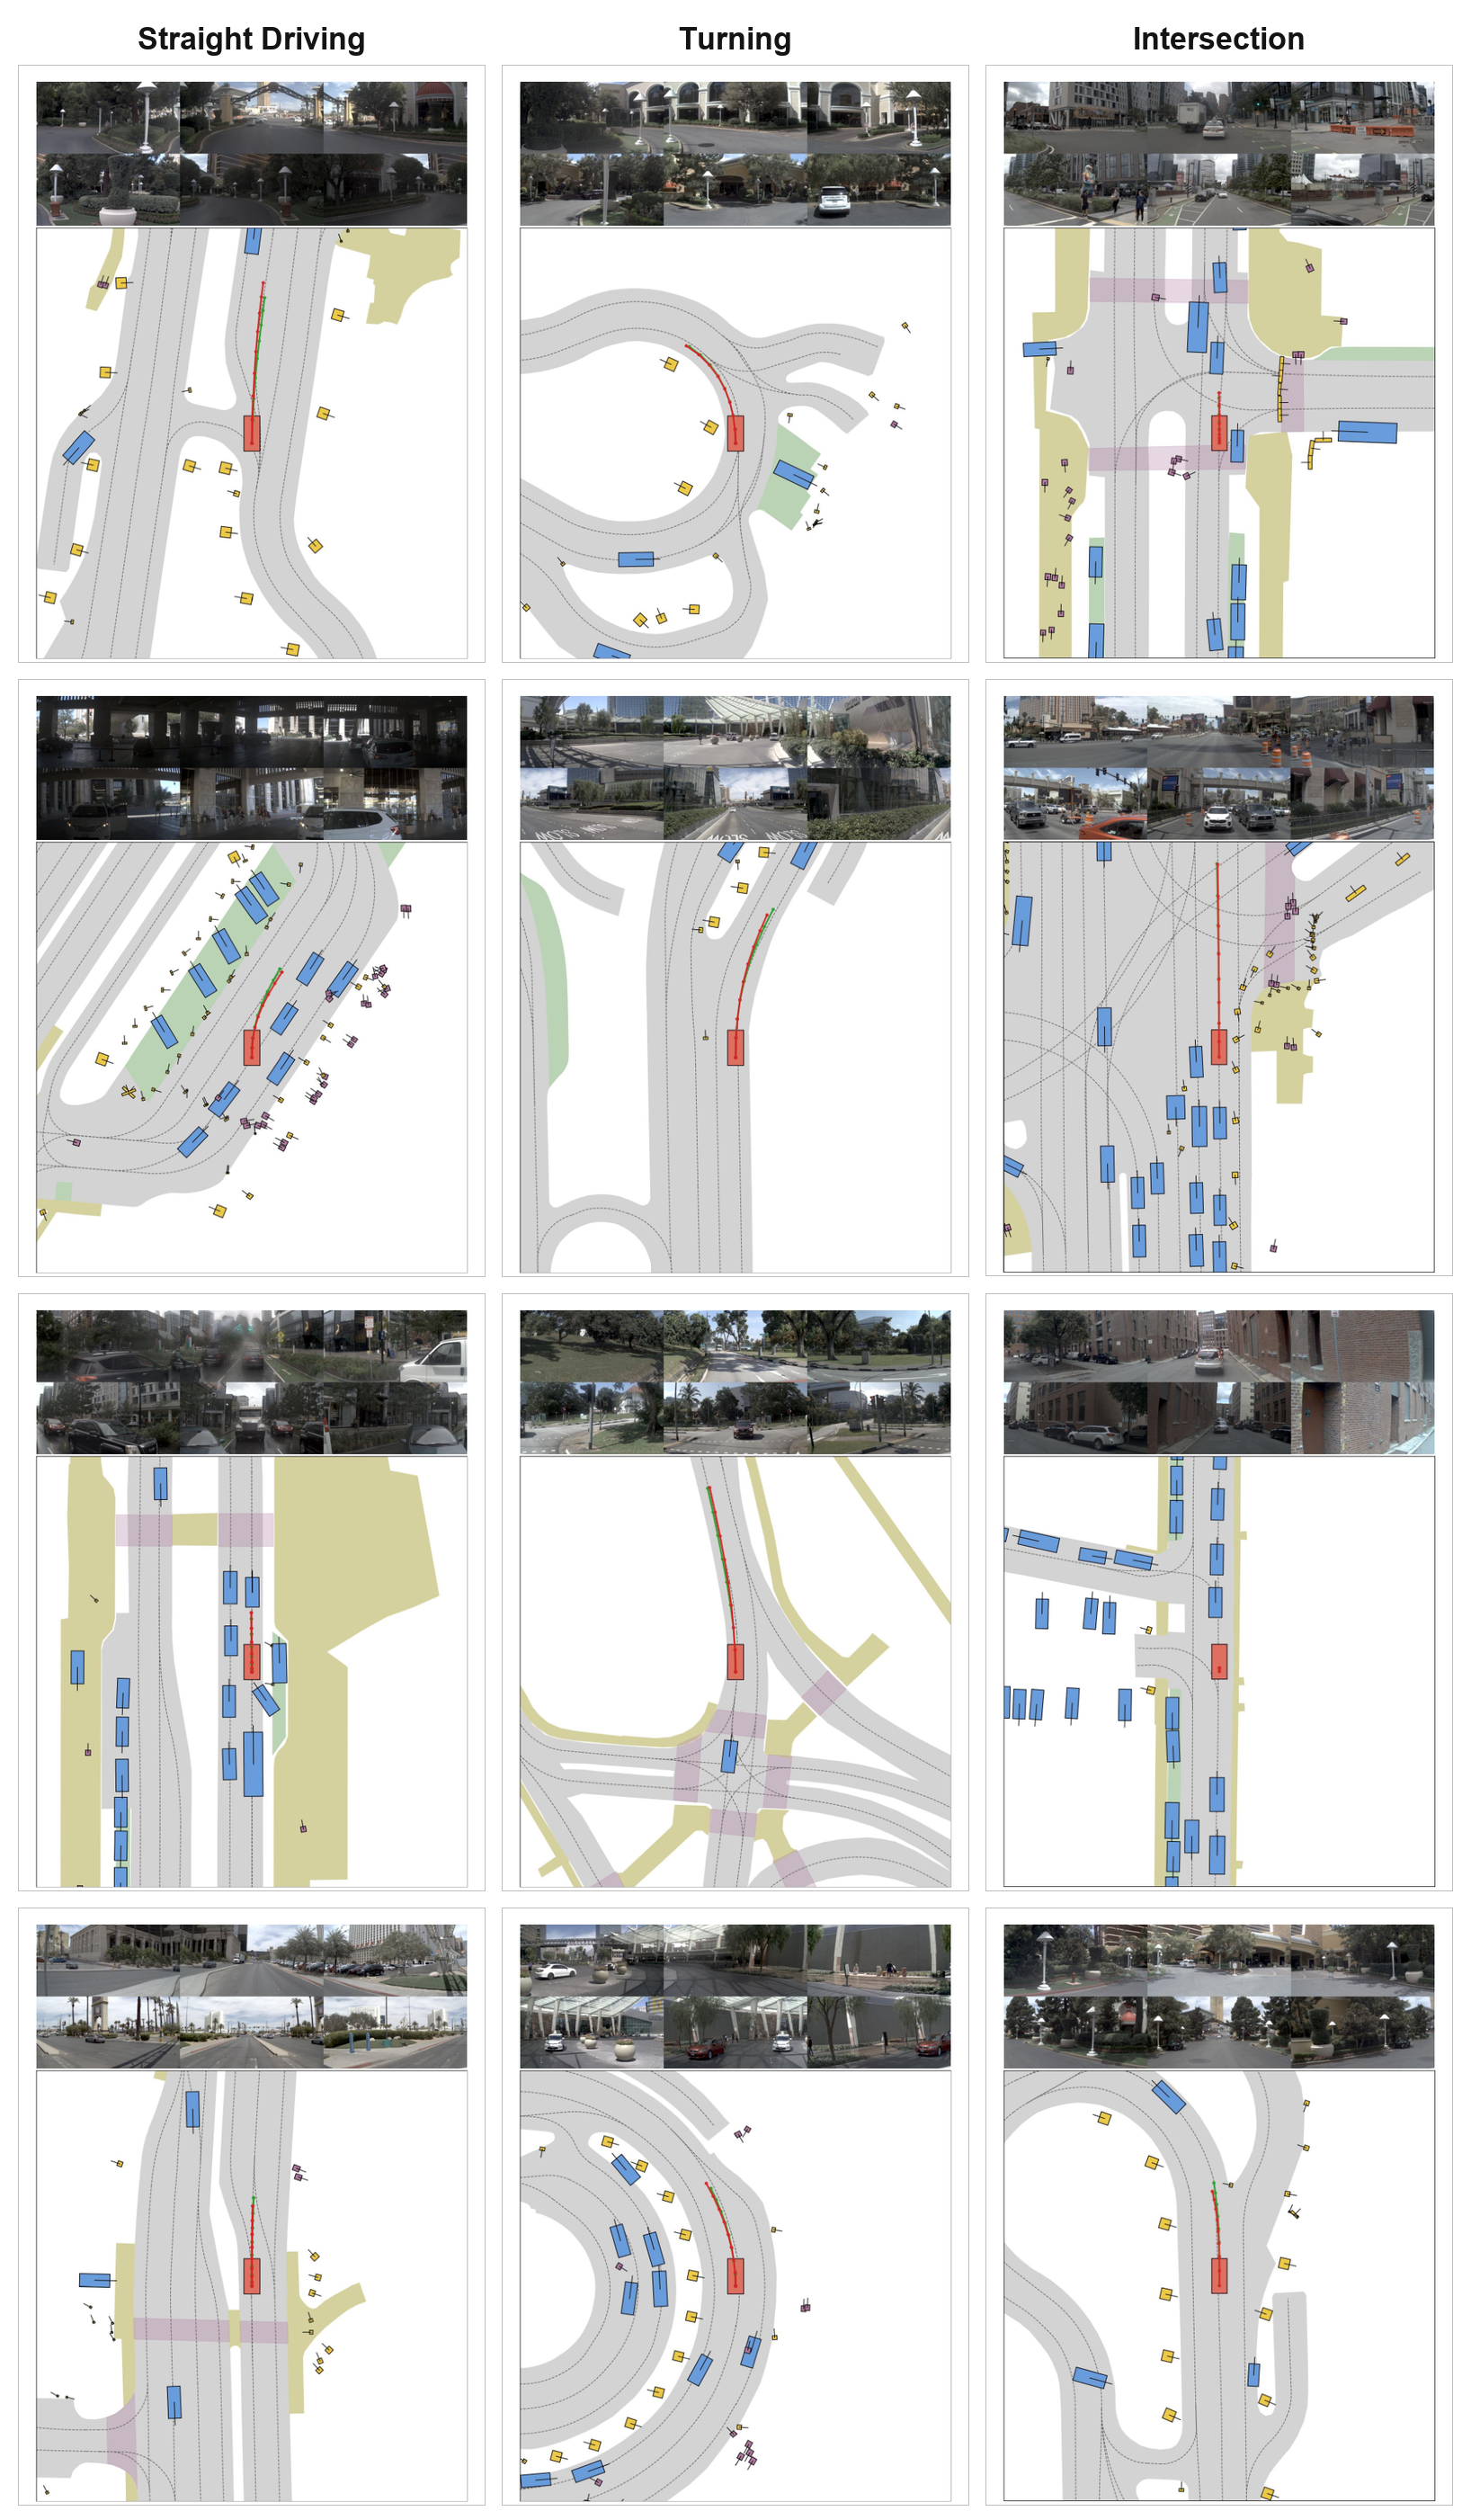
Success by scenario — set A
Success by scenario — set A View full resolution ↗
Success by scenario — set B
Success by scenario — set B View full resolution ↗

Failure Cases

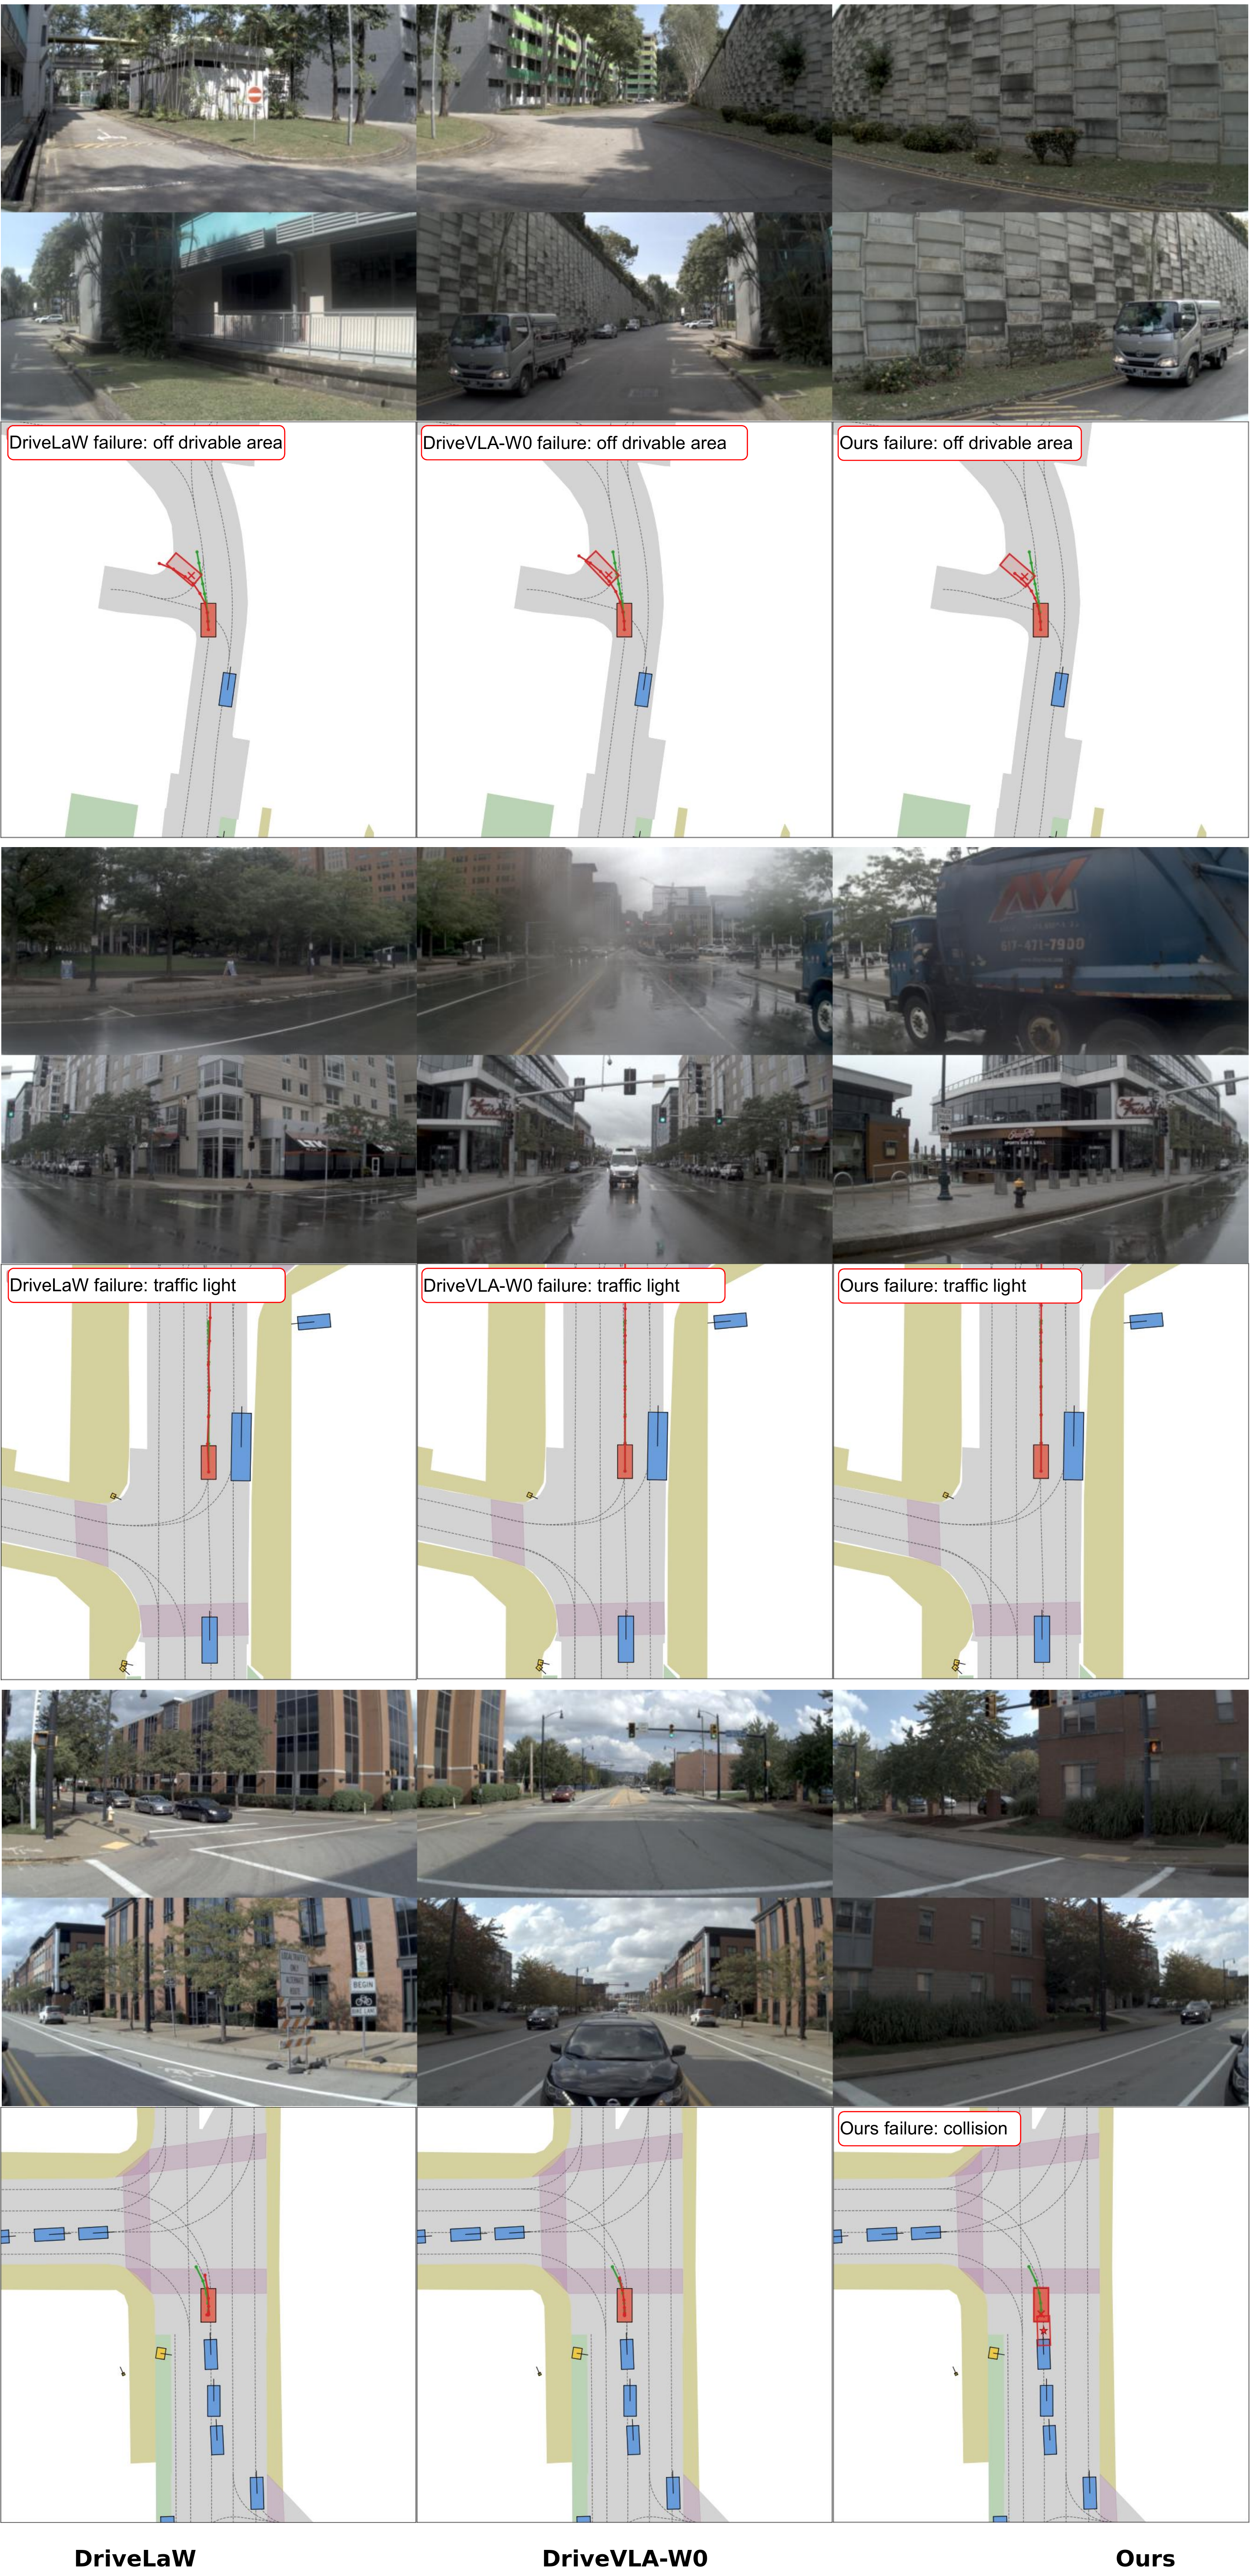
Failure case analysis
Failure case analysis — Three cases collected in the research appendix. View full resolution ↗

Additional Visualization

Supplementary project visualization
Supplementary project visualization View full resolution ↗

Paper and Code

Explore the paper, visual demonstrations, and repository release status.